So I’ve created a pile of step definitions to extend the out of box items included in DeployR. These are my own creation and not supported by 2Pint, but I have been known to help people who ask nicely.
What are step definitions? These are the items that control what a step is and how it operates, the options you see in the dashboard. When you have a task sequence, and you go to add a new step, it pulls that from a step definition.
Learn more about them here: Step Definitions | DeployR | Product Documentation
Learn more about using PowerShell with DeployR: Scripting for DeployR Server – This is important to read so you understand how to connect to your DeployR environment via PowerShell.
A sample of a few I’ve created and that are on GitHub:
- Install M365 Apps
- HP – Run Image Assistant
- Lenovo – Run LSU
- Lenovo – Install Commercial Vantage
- Readiness Checker
- Migrate Drivers from WinPE
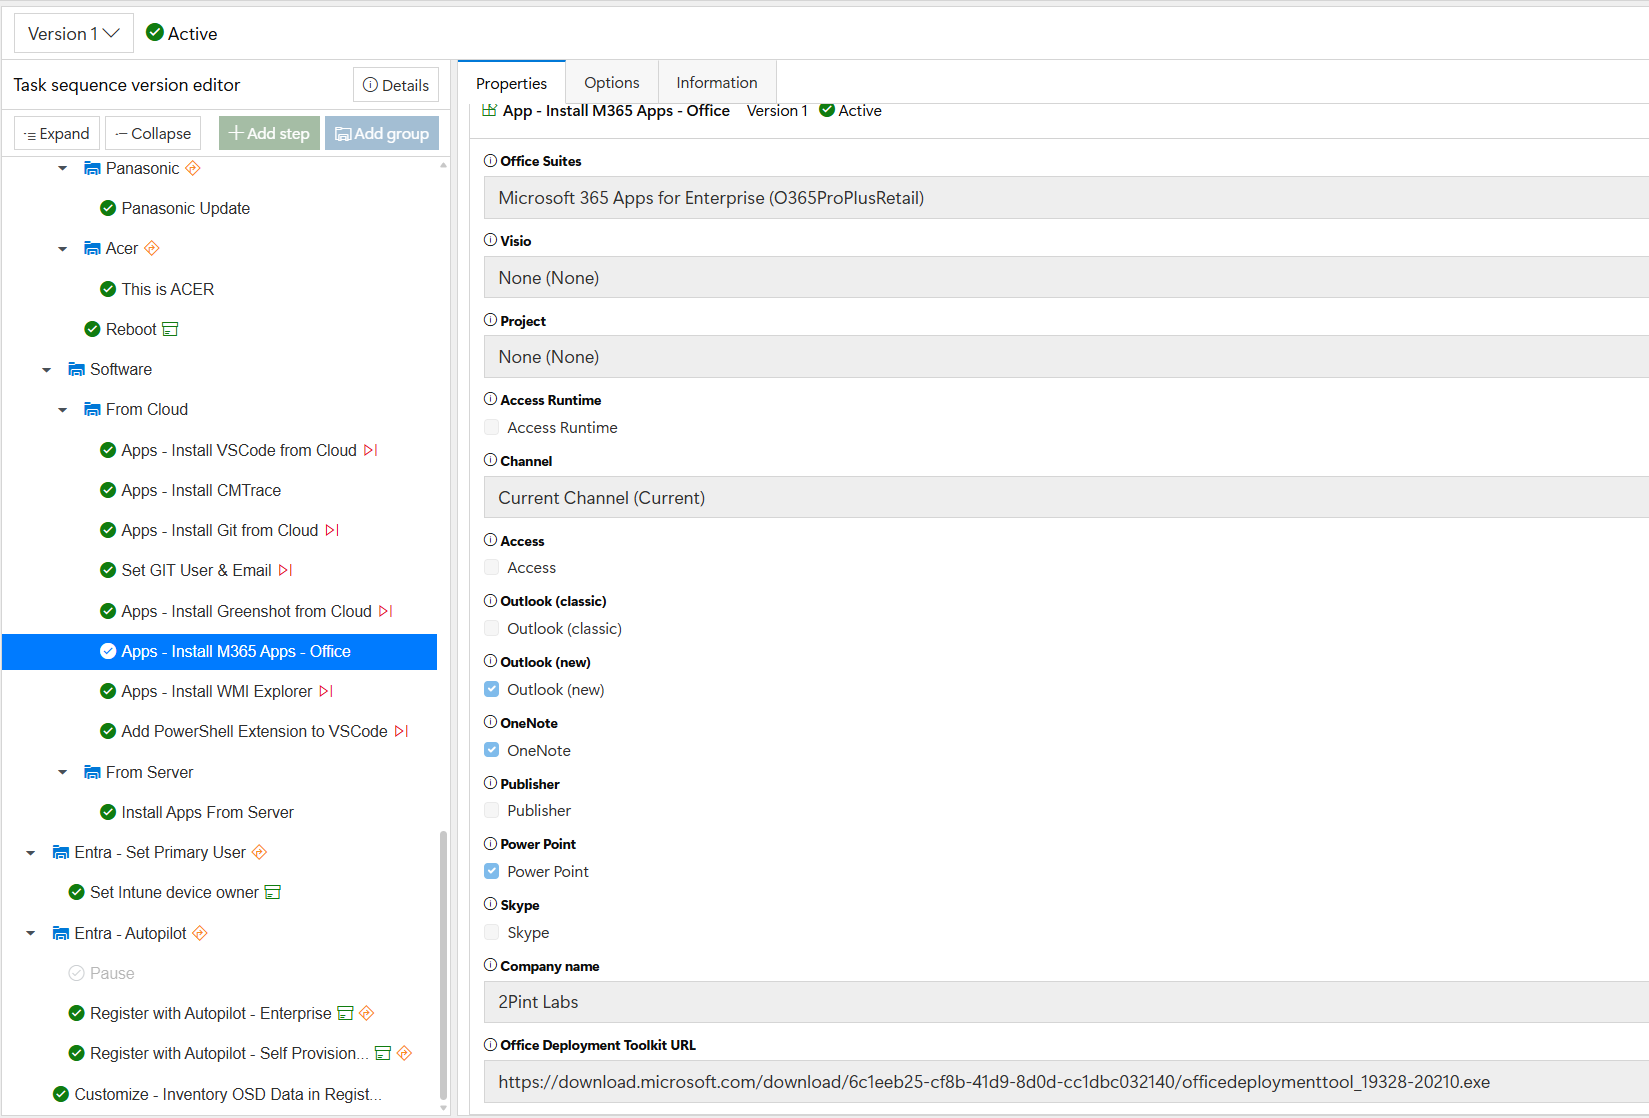
Step Definitions often have a PowerShell script that does the main execution of the item, and then takes feedback from the Dashboard of items you set, lets use the Install M365 Apps for Example, you can find a detailed write up here: Sample – M365 Office Installer | DeployR | Product Documentation
You can see that once this step is imported, you can leverage it to automate the M365 installation by choosing the options you want, the options create variables, and the variables are fed into the script during deployment:
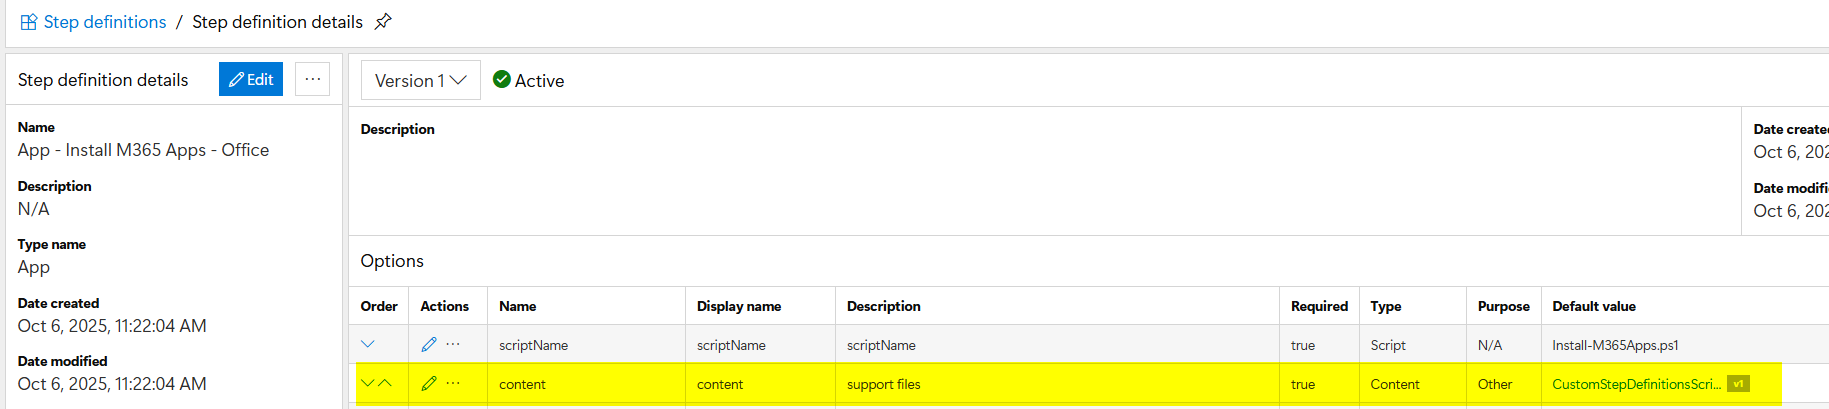
When you import a Step Definition into DeployR from the community, you’ll need to import the referenced content item first, then the step definition. Looking at the step defintion itself in the dashboard, you can see that it requires a content item, which then contains the Install-M365Apps.ps1 script.
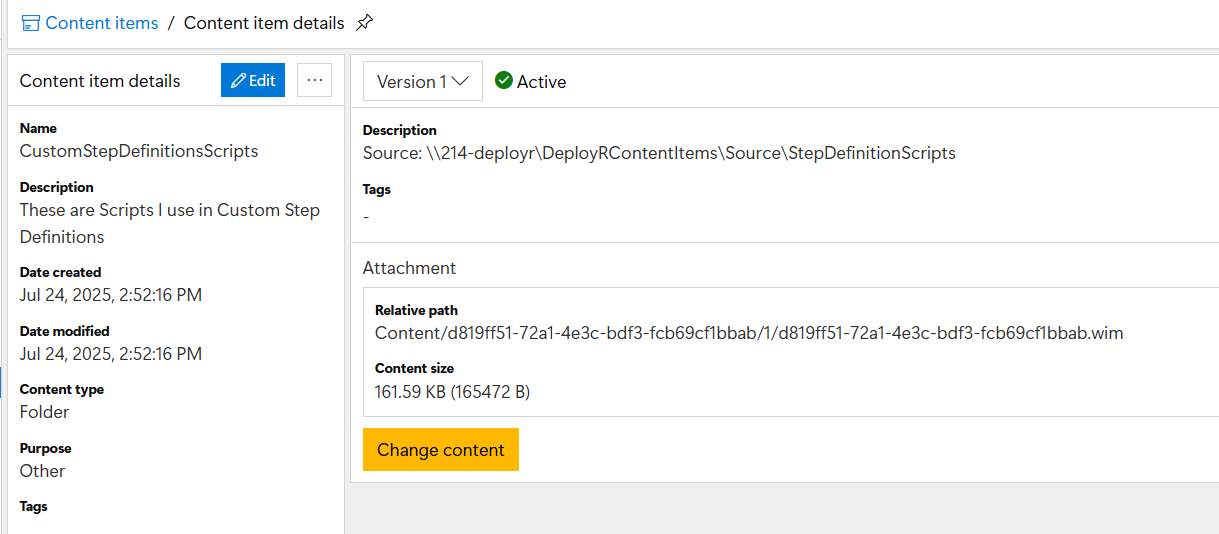
The Install-M365Apps.ps1 script lives inside the DeployR Content item named “CustomStepDefinitionsScripts”, here is the content item as shown in the dashboard, it’s a wim file containing all the scripts I used in my custom steps, which happens to include the Install-M365Apps.ps1 script as well.
So why all this detail? Basically it’s to note, when you get something from the community, you’ll need to import dependencies first.
If you’d like to use the steps I’ve created, you can find them in my GitHub: 2PintLabs/DeployR/CustomSteps at main · gwblok/2PintLabs. It might be easier to grab the full repo and then point to the desired items when importing.
Importing Content Items
If you’re importing items that have been exported from another DeployR server, it’s pretty straight forward.
Import-DeployRContentItem -SourceFile $ReferenceContentFile
If the content is already imported, and you’re doing an update, then you’ll need to be a bit more fancy, or you can just delete the content item from your dashboard and import again.
Importing GARYTOWN’s community Step Definitions
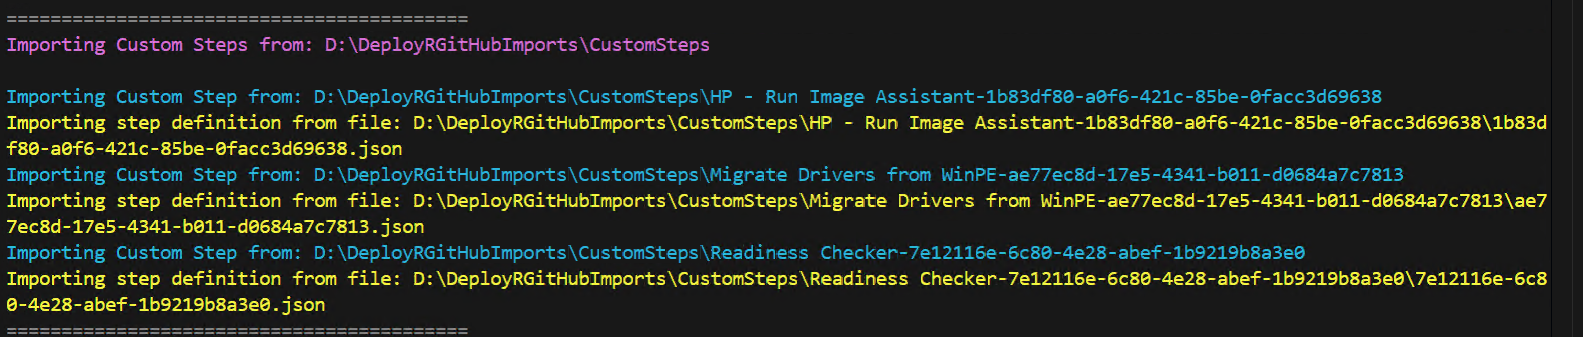
I’ve created a script on GitHub to help automate the process, it will download them from GitHub for you, then prompt for the ones you want to import:
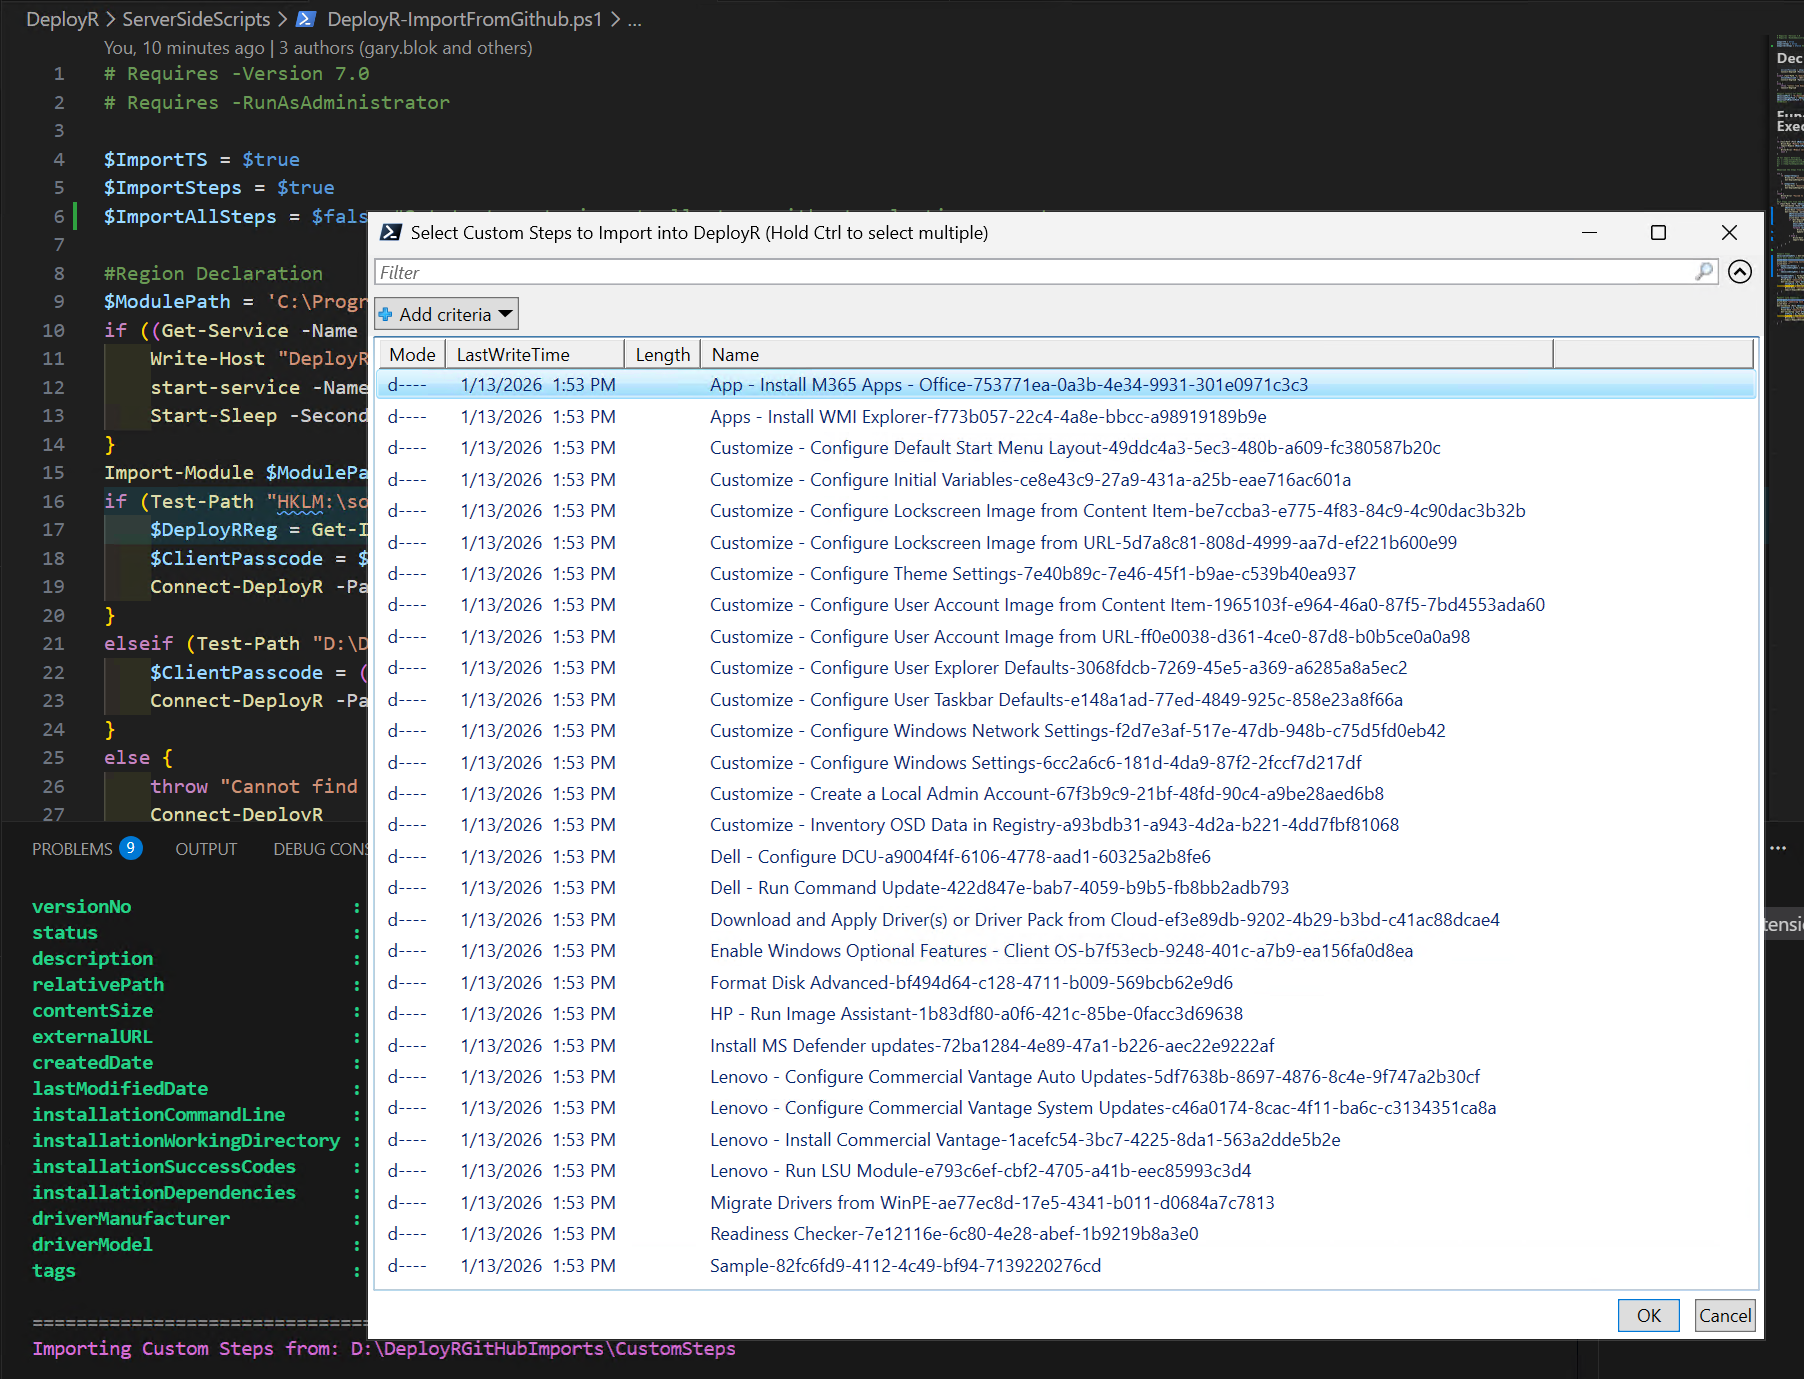
Pick the ones you want and click OK:
GitHub Script: 2PintLabs/DeployR/ServerSideScripts/DeployR-ImportFromGithub.ps1 at main · gwblok/2PintLabs
Note, make sure you read the PowerShell docs as you might need to update the auth method to connect into your DeployR environment.
GARYTOWN.COM